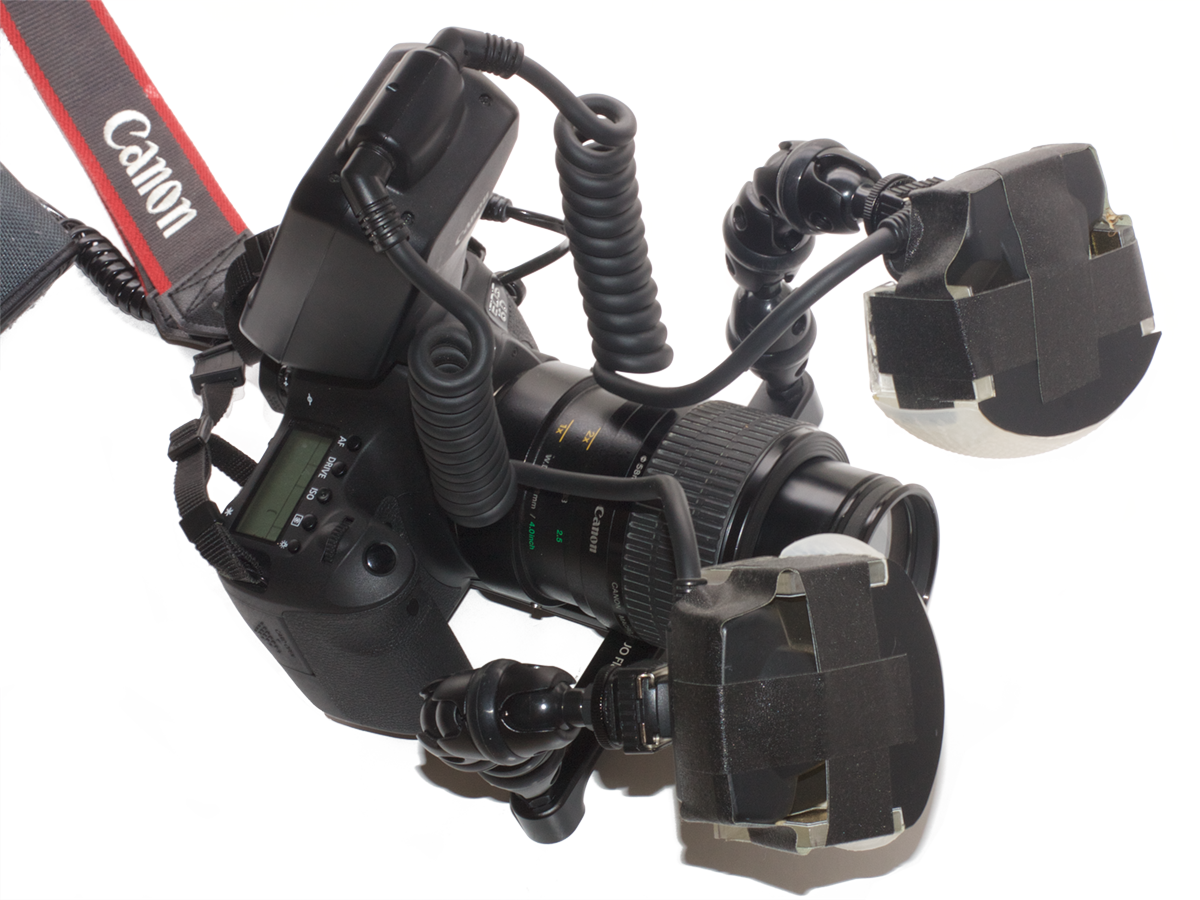
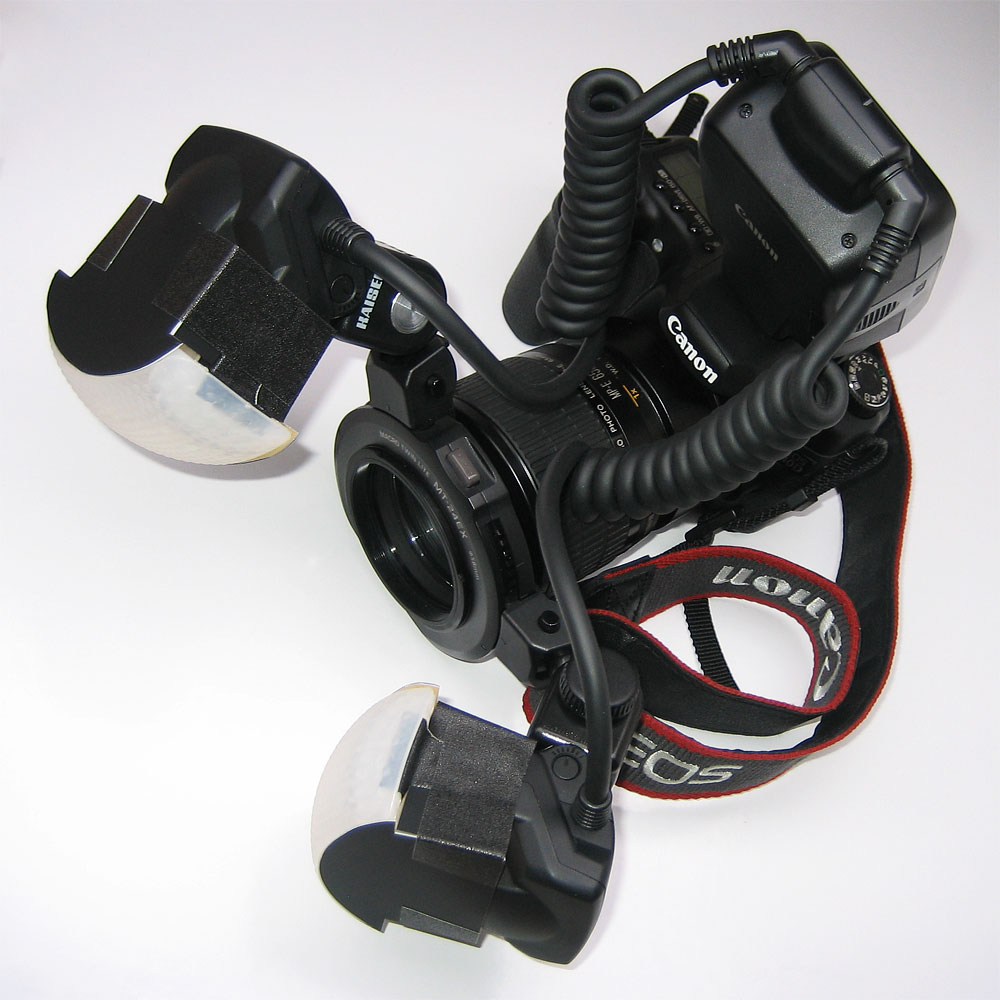
Now weighing in at 6 pounds 8 ounces! So, this is a Canon 6D with my trusty MP-E 65mm 1x-5x macro zoom lens, and the MT-24EX dual macro flash. The flash heads are attached to FotoPro DMM-903 macro flash arms, and have been modified with extra diffusion and light bouncing material inside, fronted by a pair of Gary Fong’s Puffers. There’s also a Canon compact battery pack to boost the flash (which is always in use even in daylight, as not a lot of natural light gets into this lens), so in total I’m using 10 rechargeable Ni-MH batteries (Eneloop Pro). It’s all manual focus, and I’m typically just a couple of inches away from my subject… I’m surprised I can blend in at this point ;)
Long, long ago, I used Fuji Velvia slide film with a Minolta X-700 and standard lens, along with a set of three different add-on magnification filters for occasional macro shots (in the rainforests of Trinidad and Tobago!) When I first went digital, I used a simple digital point-and-shoot camera (a Canon SD450). It had a macro mode and (of course) automated focus, and key to my success was setting the focus point to center (rather than the “intelligent” mode where it considers the whole frame for points of focus). These settings made for some pretty decent shots, though I never did see the hairs in the eyes of honey bees, nor could I see the three simple eyes (ocelli) on bee heads. My new dedicated macro rig is far different than this Canon SD450 point-and-shoot, and yet I continue to use some of the techniques I honed then. In this post I’ll discuss these techniques, as well as some others that are relevant only when using a dedicated macro lens with external flash.
Approach when bees are busy!
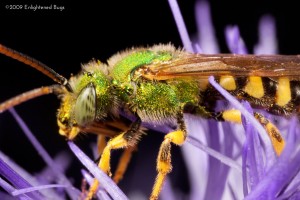
In macro photography (for the most part, though it depends on the lens), we’re very close to our subjects… just inches away. Being that close means knowing something about the behavior of the creature in question. For bees and other pollinators, I became quickly aware of how close I could get… mostly, as close as I need, it turns out. When they’re foraging, most bees (honey bees and bumble bees, particularly) seem pretty much oblivious to the photographer. It helps to approach a subject who’s already immersed head-down in a flower, that way when the pollinator emerges from the flower depths, one is already installed waiting and there’s no need for sudden movement. It also helps (in terms of bee temperament) if one stays out of flight paths, though bees do adapt if you’re in one (most of the time… otherwise, you may have bees nearly collide with you, briefly alight on you, or showily buzz at you!)
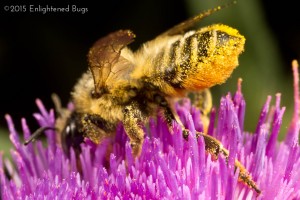
Bees collecting pollen often spend longer on a flower
If you’re photographing a nice patch of flowers, you may notice certain flowers get more visits, or other patterns in local pollinator behavior. It rarely helps to chase bee after bee with the camera! If you’ve a good set of flowers with plenty of bees, you’ll have much more luck sitting in wait on a particular set of flowers. I pick these flowers for being ones that are easily accessible (no balancing on one leg!) with good lighting (take a few test shots without bees to check!) Flowers all have different “recharge” times in terms of when nectar is available, and bees can tell how recently another pollinator has been there (all without alighting on the flower!) by the presence of scent from other pollinators’ feet (surprising, isn’t it? I learned this in Dave Goulson’s book A Sting in the Tale: My Adventures with Bumblebees). Coupling their awareness of “smelly feet” with their knowledge of the recharge frequency of those particular flowers saves them a lot of time and energy they’d otherwise spend alighting on depleted flowers. Having said this… just this week I was noticing, in a patch of crocus, repeated bee-after-bee visits to particular flowers, and each time a lengthy visit. On closer inspection, these bees were specifically after pollen, not nectar, and these favored flowers were all peaking in pollen production. Just sitting and observing the scene for five or ten minutes will often reveal behavior the photographer may leverage :)
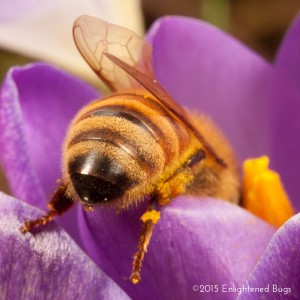
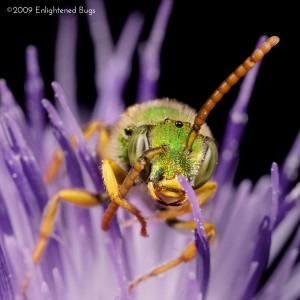
Narrow depth of field is more noticeable head-onThis angle makes the most of limited depth of field
Try to compose your shot, with the insect sitting in a pleasing spot within the frame. I often frame a shot knowing a nearby bee will likely stroll my way soon! Make the most of angles that appear to enhance rather than detract from the inherently narrow depth of field (extremely narrow when using a dedicated macro lens). I often cue off fluff near (or in the case of honey bees, actually on) their eyes. It turns out that (as with other portrait photography) what’s most important is getting a subject’s eyes in focus. Most dedicated macro zoom lenses do not support automatic focus, and adjusting the lens itself affects the subjects size (by zooming in or out). So my method of focusing is to get within shouting distance, as it were, then rock back and forth slightly (physically, my whole body!) I always used the back panel screen on my little point-and-shoot while taking macro photos (happily auto-focused). With my macro rig, I instead always use the viewfinder when taking shots, as it appears to show the focus better. I then use the back panel screen for quickly proofing recent shots to check exposure and focus (by zooming in).
One surprisingly difficult thing when using the dedicated macro setup is simply finding one’s buzzer! Especially quickly when that subject is moving far faster than a human. On that front, I’ve found practice to be the only solution… and keeping an ear out, as I can often tell how close a buzzer is by their sound, and if I’m lucky I see their shadow while I’m looking through the lens, and know they may well be approaching soon! It helps a lot to take photographs during the earlier morning and later afternoon times too, as buzzing creatures buzz just a bit more slowly at each of those times :) The lighting is also often prettier. Don’t expect bees to be early risers though, it’s typically warm and sunny before they’re out and about.
One final note: don’t wear bright colors! I’ve had terrible luck especially when there are colorful flowers in the design :) One wants to be observing natural behavior, not confusing and annoying bees, after all! Now I try for greys and greens to blend in.
Here’s how my macro setup currently looks. The flash heads rotate around the ring, and can be swiveled up and down individually too. There’s all sorts of customizations I’ve made… those are the subject for a future post ;)
Thomas Shahan is another Oregon macro photographer I follow… his jumping spider photos are especially captivating! Here are his 10 expert tips for successful macro photography.
This isn’t exactly a buzzy moment, but I thought I’d post a photo of my current camera gear (along with my most recent customizations :) What you see here is a Canon EOS 40D with an MP-E 65mm macro zoom lens and an MT-24EX flash controller for the two macro flash heads on the ring at the front. The flash heads can each move up or down, from side to side, and around the ring itself.
I’ve built custom diffusers that I’ve attached directly to the flash heads with gaffers tape. I used a shiny white cardboard to build a minimal frame around each flash head. I then curved some diffusion material over the front of this frame, acting as a first-stage diffuser. I then mounted my set of Gary Fong’s Puffers to the front of each frame. To finish each off, I used gold matte reflective flash bounce material to seal off the top and bottom.
With this setup, I’m able to take shots anywhere between 1x and 5x life size (I’m typically shooting between 2x and 3x). To do so, the lens is approximately 2-4 inches from the subject. All my shots are hand-held… the flash itself fires with such short duration (around 1/1200th of a second) that I’m able to freeze the motion in a scene. I have only millimeters of depth of field to work with, so I look for angles that make the most of that depth. Taking photos of active insects buzzing about their daily lives is the most challenging and rewarding photography I do (it’s much easier if they’re simply sitting on a cold day covered in morning dew ;)
Update: I’ve tweaked this setup quite a bit since I wrote this article! Take a look at my most recent modifications.

 This isn’t exactly a buzzy moment, but I thought I’d post a photo of my current camera gear (along with my most recent customizations :) What you see here is a Canon EOS 40D with an MP-E 65mm macro zoom lens and an MT-24EX flash controller for the two macro flash heads on the ring at the front. The flash heads can each move up or down, from side to side, and around the ring itself.